Working with Thermoplastics - Acrylic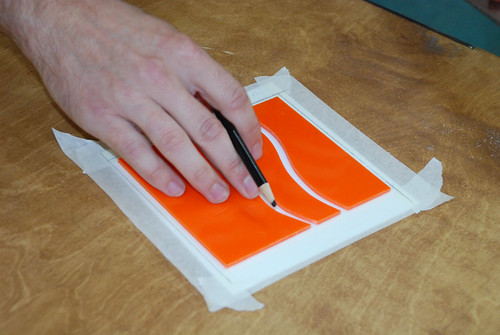
Image by Jordanhill School D&T Dept
Here Mr. Sludden demonstrates the practical process behind the manufacture of a simple thermoplastic clock.
He starts by cuting out the template from stiff card. He then transfers the design onto the back of the acrylic that has had a layer of masking tape applied. A biro or black pencil can be used. It is important that the line is clearly visable.
Next he demonstrates cutting methods using the coping saw and fret or scroll saws. Note his position in relation to the workpiece in these examples.
Next, edge finishing techniques. Start by selecting the appropriate file. Flat, half-round or round are appropriate here. Begin by cross filing then use drew filing to complete this stage. Then choose coarse [180 grit] then fine [400 grit] silicon carbide or wet & dry abrasive papers to smooth the edges further. Complete by applying a metal[!] polish like Brasso or T-Cut to really polish the edge.
Next assembly. We used double sided tape here because the surfaces are not load bearing. In other designs we would recommend Acrylic Cement or sometimes Super Glue. These are fraught with difficulty and need careful masking for best results.
Next drill a 10mm hole to accomodate the clock mechanism. Use a step drill for best results. Clamp the workpiece to the drill table to avoid slippage.
Assemble clock mechanism using the array of components provided.
If necessary create a stand. Mr. Sludden demonstrates the use of the Strip Heater and Plastics Oven towards the end of this sequence. Attach to back of clock using cement. Mask first. Thermoplastic properties evident from photos provided.
Working with Thermoplastics - Acrylic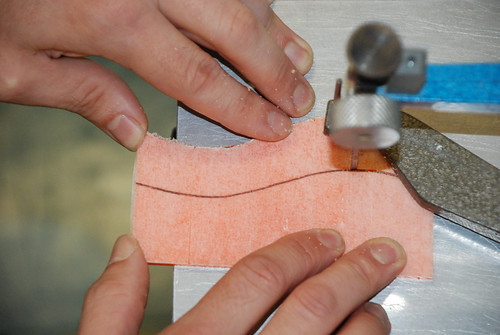
Image by Jordanhill School D&T Dept
Here Mr. Sludden demonstrates the practical process behind the manufacture of a simple thermoplastic clock.
He starts by cuting out the template from stiff card. He then transfers the design onto the back of the acrylic that has had a layer of masking tape applied. A biro or black pencil can be used. It is important that the line is clearly visable.
Next he demonstrates cutting methods using the coping saw and fret or scroll saws. Note his position in relation to the workpiece in these examples.
Next, edge finishing techniques. Start by selecting the appropriate file. Flat, half-round or round are appropriate here. Begin by cross filing then use drew filing to complete this stage. Then choose coarse [180 grit] then fine [400 grit] silicon carbide or wet & dry abrasive papers to smooth the edges further. Complete by applying a metal[!] polish like Brasso or T-Cut to really polish the edge.
Next assembly. We used double sided tape here because the surfaces are not load bearing. In other designs we would recommend Acrylic Cement or sometimes Super Glue. These are fraught with difficulty and need careful masking for best results.
Next drill a 10mm hole to accomodate the clock mechanism. Use a step drill for best results. Clamp the workpiece to the drill table to avoid slippage.
Assemble clock mechanism using the array of components provided.
If necessary create a stand. Mr. Sludden demonstrates the use of the Strip Heater and Plastics Oven towards the end of this sequence. Attach to back of clock using cement. Mask first. Thermoplastic properties evident from photos provided.
Working with Thermoplastics - Acrylic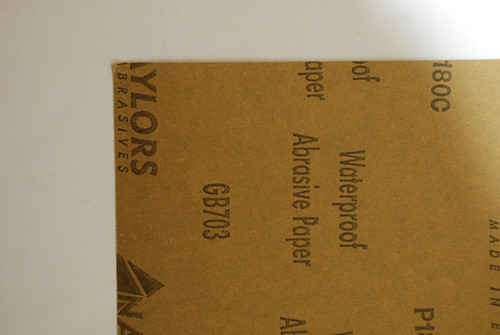
Image by Jordanhill School D&T Dept
Here Mr. Sludden demonstrates the practical process behind the manufacture of a simple thermoplastic clock.
He starts by cuting out the template from stiff card. He then transfers the design onto the back of the acrylic that has had a layer of masking tape applied. A biro or black pencil can be used. It is important that the line is clearly visable.
Next he demonstrates cutting methods using the coping saw and fret or scroll saws. Note his position in relation to the workpiece in these examples.
Next, edge finishing techniques. Start by selecting the appropriate file. Flat, half-round or round are appropriate here. Begin by cross filing then use drew filing to complete this stage. Then choose coarse [180 grit] then fine [400 grit] silicon carbide or wet & dry abrasive papers to smooth the edges further. Complete by applying a metal[!] polish like Brasso or T-Cut to really polish the edge.
Next assembly. We used double sided tape here because the surfaces are not load bearing. In other designs we would recommend Acrylic Cement or sometimes Super Glue. These are fraught with difficulty and need careful masking for best results.
Next drill a 10mm hole to accomodate the clock mechanism. Use a step drill for best results. Clamp the workpiece to the drill table to avoid slippage.
Assemble clock mechanism using the array of components provided.
If necessary create a stand. Mr. Sludden demonstrates the use of the Strip Heater and Plastics Oven towards the end of this sequence. Attach to back of clock using cement. Mask first. Thermoplastic properties evident from photos provided.
Working with Thermoplastics - Acrylic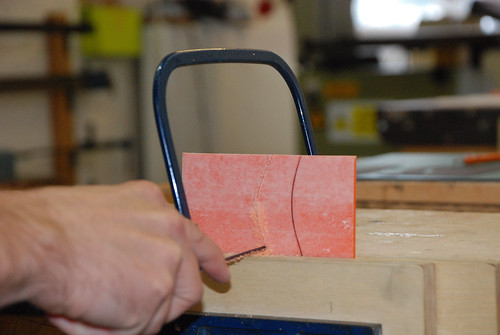
Image by Jordanhill School D&T Dept
Here Mr. Sludden demonstrates the practical process behind the manufacture of a simple thermoplastic clock.
He starts by cuting out the template from stiff card. He then transfers the design onto the back of the acrylic that has had a layer of masking tape applied. A biro or black pencil can be used. It is important that the line is clearly visable.
Next he demonstrates cutting methods using the coping saw and fret or scroll saws. Note his position in relation to the workpiece in these examples.
Next, edge finishing techniques. Start by selecting the appropriate file. Flat, half-round or round are appropriate here. Begin by cross filing then use drew filing to complete this stage. Then choose coarse [180 grit] then fine [400 grit] silicon carbide or wet & dry abrasive papers to smooth the edges further. Complete by applying a metal[!] polish like Brasso or T-Cut to really polish the edge.
Next assembly. We used double sided tape here because the surfaces are not load bearing. In other designs we would recommend Acrylic Cement or sometimes Super Glue. These are fraught with difficulty and need careful masking for best results.
Next drill a 10mm hole to accomodate the clock mechanism. Use a step drill for best results. Clamp the workpiece to the drill table to avoid slippage.
Assemble clock mechanism using the array of components provided.
If necessary create a stand. Mr. Sludden demonstrates the use of the Strip Heater and Plastics Oven towards the end of this sequence. Attach to back of clock using cement. Mask first. Thermoplastic properties evident from photos provided.
No comments:
Post a Comment